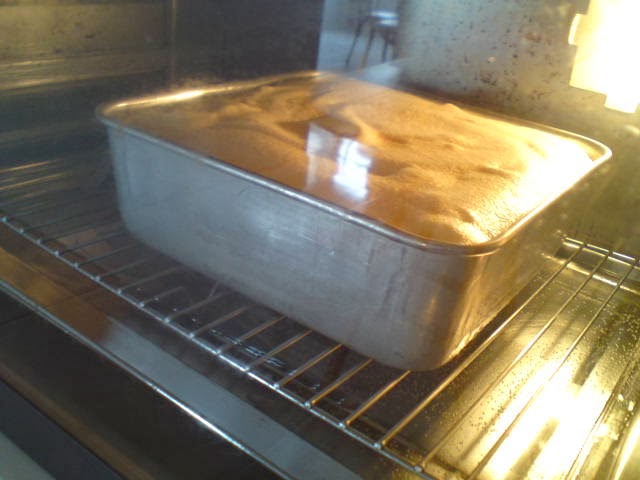
My earlier posting on this cake Orange Cottony Cake I was a bigger cake. This cake here only uses 4 eggs and I baked it in a 6 - 6 1/2 inch baking tin. The cake rose beautifully and without any cracks. The cake can be dislodged easily after cooling and shrinks just a little.


Ingredients for Egg Yolk Mixture
[use 6 1/2" or 16 cm square tin]
50 gm superfine flour - sifted
50 gm superfine flour - sifted
1/4 tsp salt
3 egg yolks
1 whole egg
35 ml corn oil
50 ml orange juice [from 1-2 oranges]
50 ml orange juice [from 1-2 oranges]
zest of 1 orange
- Place the dry ingredients in the mixing bowl and make well in the centre. Add in eggs, corn oil and orange juice. Using a paddle hook, beat ingredients until creamy and well combined. Set aside.
- Pour 1 and 1/2 cups water into baking tray, place baking rack on the tray and preheat oven at 160 degrees C for 10 minutes.
4 egg whites
1/2 tsp cream of tartar
45 gm castor sugar
- Using an electric mixer, whisk egg white until frothy, add in cream of tartar and whisk until slightly foamy. Add in sugar in 3 batches. Whisk until soft to stiff peaks formed.
- Using a spatula, fold in 1/2 of the meringue into egg yolk mixture. Lift and fold until well combined, then add to rest of meringue. Fold again until well mix.
- Pour the batter into a 6 1/2" square tin [line base with baking paper at the bottom only]. Lightly shake the pan and the batter will spread out evenly.
- Steam bake in oven at 160 degrees C for 40 minutes. Reduce temperature to 140 degrees C and bake for a further 20 minutes. [Note: for the water bath, use 1 and 1/2 cups water for the duration of baking. This way the cake base will be dry after baking].
- Remove from oven and invert the cake to cool slightly [about 5 minutes] before removing the pan and baking paper [there maybe some vapour on the baking paper].
- Cool cake completely before slicing to serve or refrigerate for slicing and serving later.


Notes: Visit this site for its' Nutritional Facts [here]
I'm sharing this post with Little Thumbs Up April 2014 Event - Orange organised by Bake For Happy Kids and My Little Favourite DIY hosted by Anncoo Journal
I'm sharing this post with Little Thumbs Up April 2014 Event - Orange organised by Bake For Happy Kids and My Little Favourite DIY hosted by Anncoo Journal

10 comments:
Hi Kimmy, this cake is an all time evergreen favourite. It is good that you provide recipe for a smaller cake. So far my smallest is 8". Should try to bake small cakes so that there won't be too much to over indulge :)
Your cake looks beautiful, like a golden pillow :)
tasty, I am gonna bake one this week too!
Hi Phong Hong, it's good to have in hand recipes that need less ingredients. Sometimes I wanted to bake a cake but I don't have enough eggs in the fridge.
Thanks Lite Home Bake, this one is really beautiful. I'm happy.
Hi Jozelyn, you should try, it's nice.
Hi Kimmy,
I like the fact that this recipe that you explored this recipe that makes ogura cake with less shrinkage. Sounds good to me!
Zoe
Hi Zoe, sometimes the outcome is unpredictable. Hope for the best...
Superb. Your cake looks so beautiful and delicious.thks for sharing
Thanks Bibi, I was very satisfied with this cake. Looks presentable and it is yummylicious too. I'll be baking it again for CNY gathering.
Post a Comment