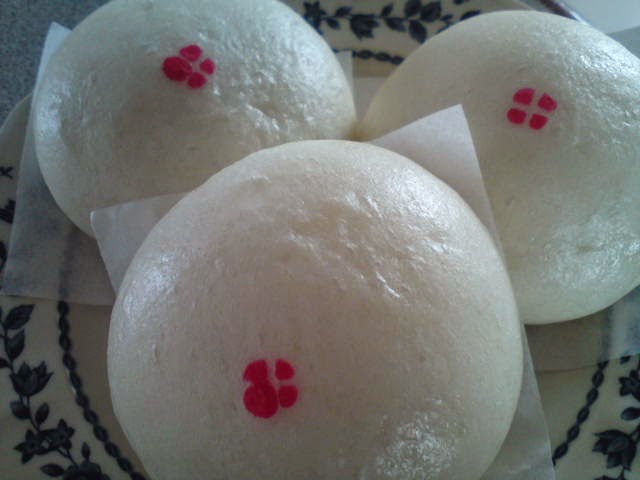
Easily manageable dough. Pau skin is soft, moist and fluffy. The dough can be prepared a day ahead and refrigerated.
Pau filling is also easy to do with minimal ingredients. You can roast you own peanuts [see this post-how to roast peanuts], grind them to use for this filling, very fragrant and makes the filling tasted better. I added some sesame seeds for added flavour. This can be prepared earlier.
You can shape the paus into any shapes you like. Here I made them rounds cos' I wasn't feeling well and just wanted to get them done fast.
Overall, a yummy pau.
Overall, a yummy pau.
Recipe Source - Yum Yum Magazine
Ingredients for the Filling
[enough for 20 paus]
250 gm ground peanuts
80 gm castor sugar
1 tbsp roasted sesame seeds - crushed [optional]
50 ml corn oil
5 salted egg yolk - steamed and quartered
[makes 20 paus][enough for 20 paus]
250 gm ground peanuts
80 gm castor sugar
1 tbsp roasted sesame seeds - crushed [optional]
50 ml corn oil
5 salted egg yolk - steamed and quartered
- Mix well ground peanuts, sugar, sesame seeds [if using] and oil. Set aside.
2 1/2 tsp instant yeast
120 ml lukewarm water [original uses 100 ml]
130 gm pau flour - sifted
100 gm caster sugar [original uses 125 gm]
120-130 ml water [original uses 100-115 ml]
120 ml lukewarm water [original uses 100 ml]
130 gm pau flour - sifted
- Mix ingredients together into a soft and rough dough. Cover and leave to rest for 15 minutes.
100 gm caster sugar [original uses 125 gm]
120-130 ml water [original uses 100-115 ml]
2 tsp double action baking powder [original uses 2 1/8 tsp]
5 tsp shortening
Using a Dough Mixer or Hand Knead
5 tsp shortening
Using a Dough Mixer or Hand Knead
- Combine all the ingredients [except shortening] with the yeast dough in a mixing bowl. Knead until well combined [about 5-10 minutes]. Then add in the shortening, continue to knead until soft, smooth and elastic.
- Shape into a ball and cover to rest for about 30 minutes [original is for 1-1 1/2 hours] or until double in size.
- Punch down dough and remove dough to a floured surface.
- Divide into 20 equal portions [about 45-50 gm] and roll into balls.
- Flatten each ball, then roll into flat circle.
- Wrap filling with each flatten dough. Gather the edges and shape into pleated paus or round balls. Place on parchment or greased proof paper in the steaming tray.
- Leave to prove for 45 minutes from the time you finished shaping the last pau or until double in size.
- Steam over high heat for 10-12 minutes in a steamer. Off heat and leave paus for a further 2-3 minutes before uncovering and remove to cool on wire rack.
This post is linked to the event, Little Thumbs Up organised by Bake for Happy Kids and My Little Favourite DIY, and hosted by Diana from the Domestic Goddess Wannabe


16 comments:
Wow, look at your baos with such smooth skin! Peanuts with salted egg yolks fillings, must be yum. Thanks for sharing.
Hi Kimmy,
The sweet and salty nutty fillings of these bao sounds very delicious. I have to ask if my son will like me to make these for him :D
Zoe
Hi Kimmy, interesting ...I've tasted custard filling but I've never tasted bau with peanut and salted egg yolk filings. My big kids don't take salted eggs.
Kimmy, another yummy pau from you! I love anything that has salted egg in it hee..hee...
interesting filling, peanuts and salted egg yolks, sweet and savoury, nice..
Hi Kimmy, I am no fan of peanuts but thus is a really interesting combination of flavours!!
Hi Kimmy, Your steamed baos look so smooth and I love the filling with salted egg yolk. So yummy!
Hi Veronica, simple, easy and yummy.
Hi Zoe, these days the 'eaters' play an important part in making decision on what to cook, hehehe! I like people we dare to try something new especially those edible food that they have not eaten before. No venture no gain.
Hi Karen, maybe you can omit the salted egg and add chocolates maybe.
Hi Phong Hong, you have to try one day to steam baos, hehehe!
Hi Sonia, sweet, salty and fragrant too.
Hi Diana, use good quality peanuts, they are sweet and aromatic. You may like it.
Thanks Ann, this is another 'sure' can bao recipe [bigger portion - 500gm flour] apart from my other 'sure' can bao recipe [small portion - 350gm flour]. I will probably stick to these 2 workable recipes.
Hi Kimmy, would love to try your recipe but at what stage the pao dough can be refrigerated if made ahead of time? Thanks!
Hi Anonymous, immediately after the dough is well kneaded ready for proofing. Place dough is a durable plastic bag, tie up the bag tightly. Make sure it is well secured. Leave the dough in the fridge until required. The dough will expand when left in the fridge. Remove to thaw at room temperature before shaping. Punch down and knead for several minutes before shaping the paus.
Post a Comment