Followers

Showing posts with label Buns. Show all posts

Friday, December 4, 2020

STEAMED PULL APART EGG BUNS

This is the first time I made this kind of 'bread' with no water but eggs. It is not baked but steamed. Not sure what to call it, steamed bun-texture not like Chinese buns or paus, steamed bread-texture looks like bread but most bread are baked. Anyway, whatever it is called, I can only say that it is sort of pull apart buns, light, fluffy, soft and texture is fine. Nice colour and not sweet like most buns. 
My hubby said it is nice and suggested that it would be great if some dried fruits like raisins, cranberries are added and maybe some chopped ham pieces. Idea noted. probably, I will make another with these additions. But, I need to share that with all eggs and no water, the dough is rather sticky to knead with hand. I suggest to gradually add the eggs in batches. It may not be too sticky and difficult to knead with hand.
Ingredients
300 gm low protein flour or pau flour 
3 gm instant yeast
30 gm castor sugar
3 eggs [about 160-170 gm]
30 ml melted butter or corn oil
some extra beaten egg for glazing
some honey for glazing
some toasted sesame seeds or dessicated coconut
  1. In a big bowl, put in flour, yeast and add in eggs.  Mix ingredients with a pair of chopstick.  Mix and knead with hand into  rough dough. Cover and rest for 5-10 minutes.
  2. Add in melted butter or corn oil.  Continue to mix and knead with hand until soft, smooth and elastic [about 20 minutes].  Shape into a ball, cover and leave to rest until double in size.
  3. Punch down and knead for another 5-10 minutes.  Divide into 8 equal portions.  Roll each portion into small balls.  Arrange dough in a greased 7-8 inch  round baking tin.  Cover with cling wrap and leave to proof until double in size.
  4. Bring water to boil in a steamer.
  5. Remove cling wrap, brush with egg glaze.  Cover with cling wrap.
  6. Steamed dough in steamer over high heat for 40 minutes.  
  7. Removed from steamer, remove cling wrap and brush with some honey.  sprinkle sesame seeds or dessicated coconut [I sprinkle sesame seeds after brushing egg glaze].  Dislodge buns from baking tin to cool on wire rack.

Thursday, September 17, 2020

STEAMED PUMPKIN BUNS WITH RED BEAN PASTE


Didn't know that this recipe is so good. It is easy and simple to make but the result is awesome. The pumpkin buns with red bean paste filling looks good and it is also good to eat immediately. It is soft and fluffy, not too sweet. Great to have for breakfast or tea time with hot Chinese tea. 
Advisable to steamed for 5-10 minutes over high heat before serving if eating the next day.
Ingredients
160 gm steamed pumpkin puree
3 gm yeast
1 small egg
20 gm caster sugar
280 gm low protein flour or plain flour
Filling
100 gm red bean paste [store bought]

  1. Peel the pumpkin skin, cut into big pieces, scrape off the seeds, sliced about 160 grams pumpkin and steamed for 15 minutes. Drain off excess liquid, mesh the steamed pumpkin while hot.
  2. Add in 20 grams of sugar, stir to dissolve. Continue to stir, then add in 1 egg when cool to room temperature. Keep stirring before adding 3 grams yeast.
  3. Continue stirring until yeast dissolves. Then gradually add in 280 grams plain flour [can use pau flour or low protein flour]. Stir into a rough dough, then knead with hands into a smooth dough.
  4. Add 20 gm corn margarine, continue to knead it again until dough is soft, smooth and pliable. Roll into a ball, then divide into 9 equal portions then roll into small balls.
  5. Roll each into a circle, wrap with some red bean paste [1/2 tbsp], seal well and roll into a smooth ball. Place on a greased 7 inch cake tin [I used a loose bottom tin] as shown in the picture.
  6. Cover with cling wrap to proof until double in size. Lightly glaze with beaten egg yolk. Sprinkle toasted white and black sesame seeds.
  7. Steamed over high heat for 30-35 minutes. Off heat, leave in steamer for 5 minutes before removing.
  8. Invert to remove bun from mould, Serve with a hot beverage.

Thursday, March 23, 2017

MILKY COCONUT ROLLS

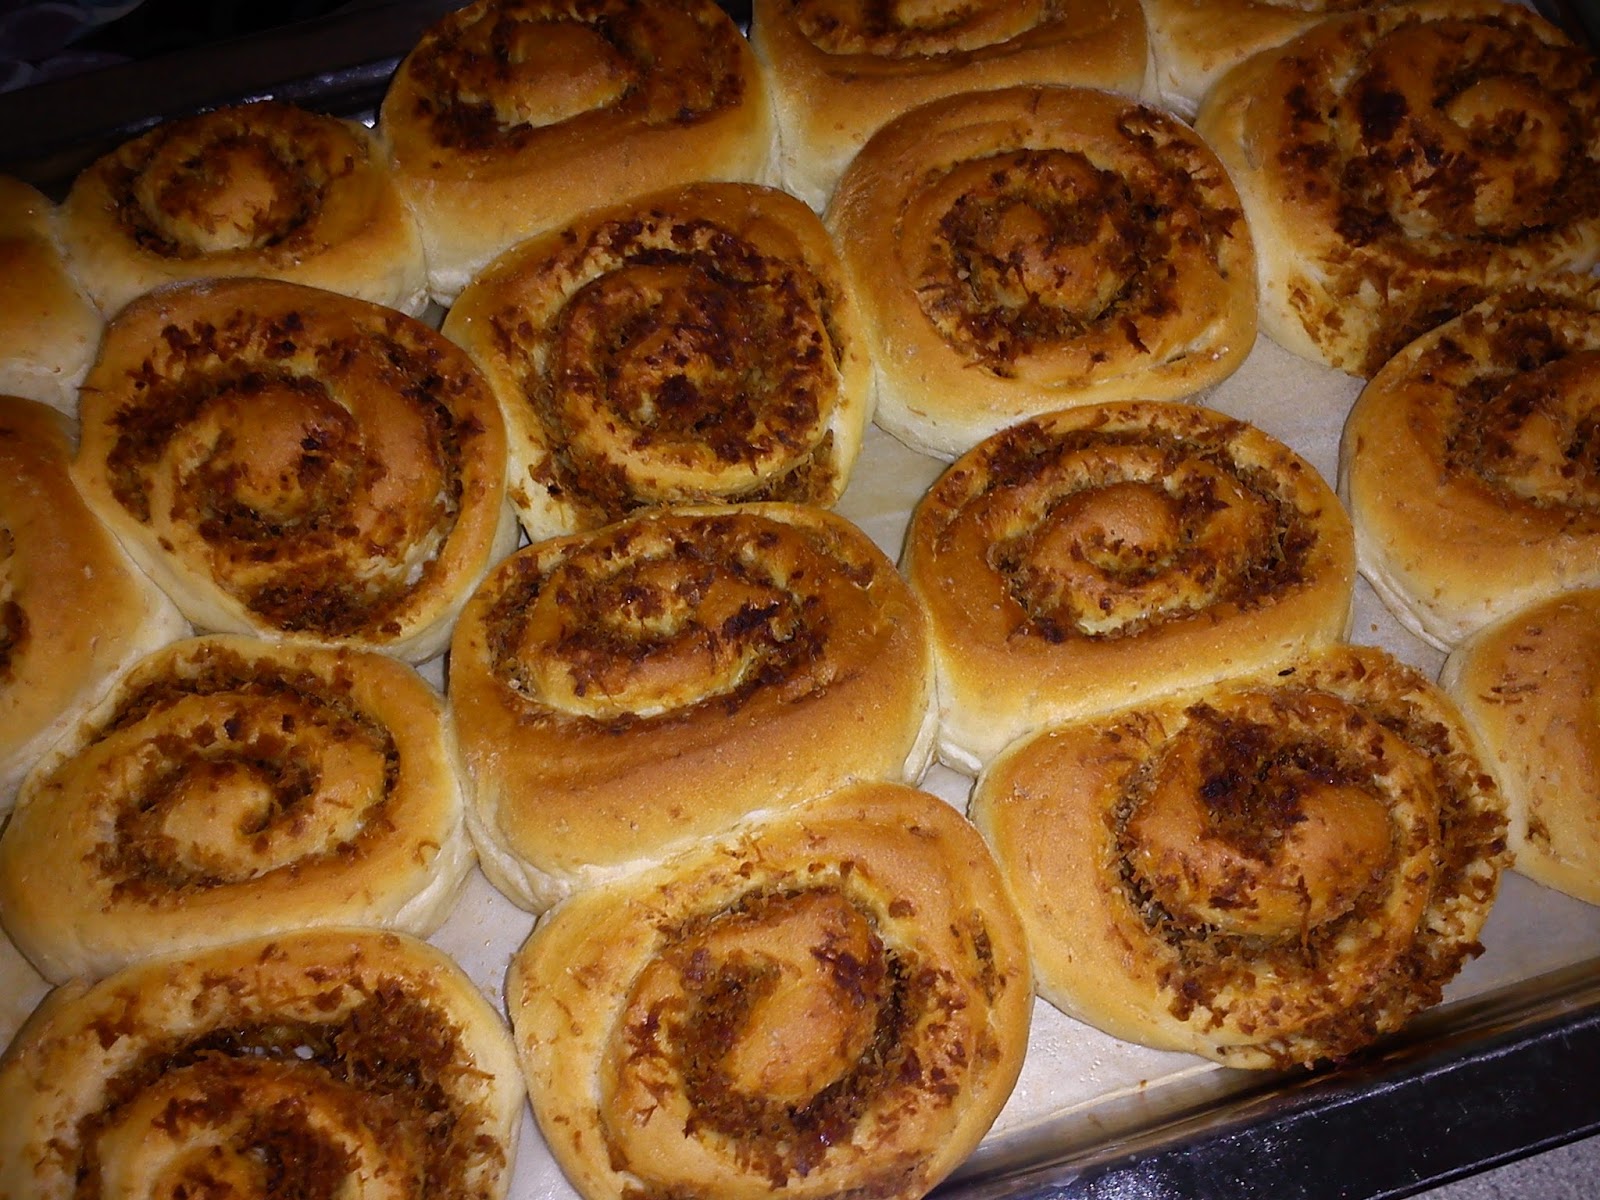
I love buns, baos, kuihs with coconut filling.  They are fragrant and tasty.  For this bread rolls, the grated coconut is sweetened with palm sugar [gula Melaka] and condensed milk.  Looks good and tastes good too.
These simple bun dough is easy to handle as the dough is soft, smooth and pliable.  The baked buns are soft and moist but not so after a day.  Anyway, not to worry, it wouldn't go to waste as these are still good when reheated in the oven or steamed.


Ingredients For Coconut Filling
250 gm grated white coconut
100 gm palm sugar [gula Melaka]
2 tbsp condensed milk
  1. Combine sugar and grated coconut in a non stick pan, stir until sugar dissolves.
  2. Add in condensed milk and stir  continuously  to mix well and cook until the paste is almost dry but moist.
  3. Off heat and cool before use.

Ingredients For Bun Dough
250 gm wholemeal bread flour
50 gm plain flour
1 ½ tsp instant yeast
50 gm castor sugar
120 ml water
20 gm butter
  1. Combine all the ingredients [except butter] in a mixing bowl.  Knead until the dough is soft and add in butter.  Continue to knead dough till smooth and pliable.
  2. Shape into round, cover to rest for 20 minutes of double in size.  Punch down and roll into a ball.
  3. Dust board with some flour, roll dough into a rectangle.  Spread coconut filling evenly all over the dough.
  4. Roll dough into a log and seal the edges well like a Swiss Roll.
  5. Cut roll into 1 inch width, make a slight in the centre  and open up to make an inverted roll.
  6. Place on a line baking tray.  Leave to proof for 30 minutes or double in size.
  7. Bake in a preheated oven at 200 degrees C for 12-15 minutes or golden brown.

Friday, May 20, 2016

MINCED CHICKEN MUSHROOMS BUNS

Savoury baked buns for a change after having mostly buns with sweet fillings.  This filling is savoury sweet and aromatic with the pasta sauce.  The bun skin is not too sweet with this amount of sugar.  These buns stay soft and moist on the next day.  I kept some in the fridge for days and steamed them before serving.  It's soft and chewy.
This time, I shaped the buns elongated in shape and the filling was not at the centre.  I suppose, this is typical of home-baked buns, not that professional, hahaha!  Needs practice and further improvement.
Recipe adapted from my selected cookbook for Cookbook Countdown Event #5 -Yum Yum Magazine No. 48 [modified]
Ingredients for Filling
250 gm chicken breast meat - minced
1 yellow onion - peeled and chopped
1 small can button mushrooms - diced
4 tbsp pasta sauce
3 tbsp water
salt and ground black pepper to taste
  1. Heat 1 tbsp oil in a non stick wok, saute onions until aromatic, add in minced chicken.  Stir fry until meat turns white and firm, add in button mushrooms and remaining ingredients.  Add water, bring to boil.
  2. Stir fry until almost dry.  Dish up to cool.
Ingredients for Bun Dough
[makes 16 buns]
500 gm bread flour
1/4 tsp salt
15 gm instant yeast [I used 1 tbsp]
1/5 tbsp milk powder
50 gm castor sugar
2 small eggs [set aside 1 tbsp for glazing]
180 - 200 ml water [add gradually]
50 gm butter [original uses 80 gm]
Some dried oregano - garnishing
  1. Put all ingredients [except butter] into a mixing bowl, beat at medium speed until well mixed.  Add in butter and continue to knead until soft, smooth and elastic.
  2. Shape into round, cover and leave to rest for 20-30 minutes or until double in size.  Punch down and divide dough into 16 equal portions.
  3. Shape each portion into oval shape.  Flatten and wrap filling [about 1 heaped tbsp], seal the edges well and shape into an elongated shape.  Place on paper case.  Repeat the same for the remaining ingredients.
  4. Place bun dough on baking tray.  Leave to proof for 40-50 minutes or double in size.  Brush egg glaze and sprinkle some dried oregano.
  5. Baked in preheated oven at 180 degrees C [middle rack] for 15-20 minutes or until golden brown.
  6. Remove to cool on wire rack before storing or serve immediately.


This post is linked to Cookbook Countdown #5 hosted by