

As the lazy bug is in me these days, I thought this kind of pastry is easier to make than the traditional baked mooncake skin. Moreover, there is a wide range of fillings easily available. Since these are for giveaways to my mom and MIL, I decided to use just red bean paste.


Instead of shortening which I don 't have, I replaced it with butter.
Verdict - it's crunchy and tasty. Good pastry for Shanghai Mooncake. My hubby gave a Thumbs Up. Later, my MIL also likes it.
Ingredients for pastryVerdict - it's crunchy and tasty. Good pastry for Shanghai Mooncake. My hubby gave a Thumbs Up. Later, my MIL also likes it.
[makes 20 x 30 gm]300 gm plain flour40 gm custard powder
1 flat tsp baking powder
1/4 flat tsp salt
80 gm icing sugar
1 egg - lightly beaten
75 gm shortening (Crisco brand) - replaced with butter
75 gm butter/margarine
1/2 tsp vanilla
Almond flakes/pumpkin/sunflower seeds/white or black sesame seeds - I used sesame seeds
Egg glaze - 1 egg yolk + 1 tsp water or milk + a tinge of salt
For the Filling
[makes 20 x 20 gm]
400 gm red bean paste [store bought - less sweet paste]


- Divide the red bean paste into 20 gm each, roll up lightly into a ball. Set aside.
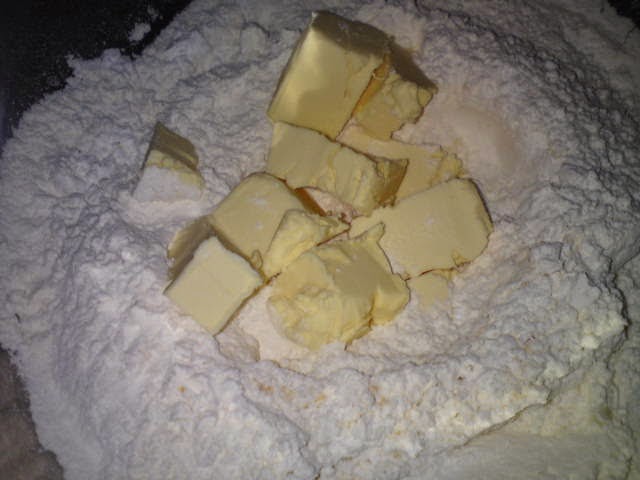
- Sieve the flour with baking powder, custard powder, icing sugar and salt into a mixing bowl.
- Cut and rub in butter with your finger tips or dough cutter till it resembles bread crumbs.
- Make a well in the centre and add in the lightly beaten egg. Combine lightly to make a soft dough. Do Not Knead.
- Cover up the bowl with a damp cloth or wrap up in plastic bag and let dough rest for 30 mins.
- Divide dough into 30 gm portions. Flatten each dough into disc using a plastic sheet.
- Wrap filling in the centre of the dough and shape it into a dome. Continue with the rest of the dough.
- Place cakes on lightly greased baking tray or line with parchment paper.
- Bake in preheated oven @ 180 degrees C on middle shelf for 10 minutes. Remove from oven to cool for 5 minutes before applying egg glaze.
- Return mooncakes to oven and continue to bake for 20 to 25 minutes or till golden brown.
- Let cool on tray before removing onto a wire rack to cool completely.


This post is linked to the event, Little Thumbs Up organised by Bake for Happy Kids and My Little Favourite DIY, and hosted by Diana from the Domestic Goddess Wannabe

Kimmy, with the endorsement given by your hubby & MIL, these Shanghai mooncakes must be very good ! Cheers!
ReplyDeleteHi Kimmy! This is my preferred mooncake. I like the flaky and crunchy skin. Much nicer than the conventional ones. Thumbs up from me too!
ReplyDeleteThis ShangHai Mooncake is my favourite,love if add some Parmesan cheese in,more fragrant..
ReplyDeleteThank for linking with Best Recipes,Kimmy
Happy Mooncake Festival in advance^^
Hi Karen, by now, you know their standards, hahaha! I'm keeping the recipe for future use.
ReplyDeleteHi Phong Hong, after this I'm getting to like these too. BTW, it is easier and faster to make them than the traditional ones.
ReplyDeleteHi Fion, thanks for hosting the Best Recipe - Mooncake event. I get to know more varieties of mooncakes which I would love to try. Yes, I'll be baking these using some cheese powder.
ReplyDeleteHi Fion, thanks for hosting the Best Recipe - Mooncake event. I get to know more varieties of mooncakes which I would love to try. Yes, I'll be baking these using some cheese powder.
ReplyDeleteI haven't baked this for some time. A good reminder and thanks for the link, Kimmy!
ReplyDeletethe best part of shanghai mooncake is don't need to wait for "return oil", so much easy than traditional one, hehehe..
ReplyDeleteHi Kimmy, all I can say is these mooncakes must be really good! This is the second bake I have seen tonight!
ReplyDeleteHi Soke Hah, my hubby keeps telling me these mooncakes are good. I heard him telling his mum, too. Thanks for sharing this lovely recipe.
ReplyDeleteHi Sonia, you are right. This year I'm not baking any traditional mooncakes except the Koong Cbye Paeng. I may try your cheesy Shanghai Mooncake if I have the time.
ReplyDeleteHi Diana, I'm looking for more such recipes. They are easy to make.
ReplyDeleteHi Kimmy, This mooncakes look delicious & welldone . My family love this mooncake but not snowskin mooncake . I've yet to try out your coconut paste mooncake that I've bookmarked . Hopefully soon as now I'm in 'malas' mode! LOL
ReplyDeleteHi Kimmy, this is my favourite type of mooncake to bake as it is simple and straight forward unlike the traditional type. Thanks for linking back to my blog post.
ReplyDeleteHi Kit, do try the coconut filling and would like to know if you like it.
ReplyDeleteHi Cheryl, want to thank you for trying and sharing this lovely recipe. I'll definitely bake more Shanghai Mooncakes with different flavours in future.
ReplyDeleteYes,baking this mooncake is easier than traditional in the way that no need skill of moulding and save money as well because needless to buy mould.
ReplyDeleteHi Aunty Young, I always thought it doesn't look nice. I'm happy with this recipe. GOOD.
ReplyDelete