Monday, August 31, 2015

PORK AND EGG GOJI SOUP

This is a kind of soup that I usually prepare whenever I wanted a vegetable soup. It is easy to prepare yet aromatic and tasty. Moreover, it is nutritious soup with meat, eggs and leafy greens.
The fragrance of the soup comes from the fried ginger slices and spring onions.

Recipe adapted from Yum Yum Magazine No. 86 with modifications
Ingredients
[serves 3]
200 gm Goji leaves - washed and drain in a colander
100 gm pork belly or lean meat – sliced
700-750 ml water
A few slices ginger
1 stalk spring onions – cut 1 inch length
1 egg – lightly beaten
1 tbsp goji seeds [kei chee] - rinsed
½ tsp of salt and msg or chicken stock granules
Pepper to taste
  1. Marinate pork slices with ¼ tsp each of salt and sesame oil. Add in 1 tbsp cornstarch. Mix well and set aside for 30 minutes.
  2. Heat a little oil in a soup pot [I used claypot], sauté meat slices until slightly browned, add in ginger and spring onions. Fry until aromatic. 
  3. Add in water, bring to boil for 20 minutes or until meat is tender.  Add in seasoning to taste.
  4. Before serving, add in goji leaves to cook. Pour in beaten egg in a circular pattern, do not stir until after 10 seconds. Lastly add in goji seeds.
  5. Serve immediately.
 photo 77951578-1914-4b72-8eda-9e40a91183ac_zps331eb4b4.jpg
I'm submitting this post to Cook Your Books Event #26 [August 2015] hosted by Joyce of Kitchen Flavours

Thursday, August 27, 2015

EZCR#23 - BRAISED CHICKEN WITH RED DATES


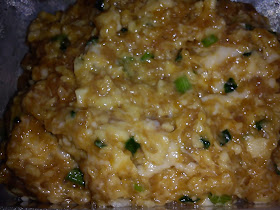
Unbelievable that this tasty chicken dish is so easy to prepare. Only a few ingredients needed that are easily available in any Chinese kitchen. Simple ingredients, awesome tastes.
Fragrant and tasty chicken pieces with softened sweet red dates. Hmmm….what a lovely dish. This dish is also versatile in that you can just eat it like this or add in some fragrant sliced Chinese leeks. Looks good, isn’t it? Nope, tastes good too.
Shared some with my SIL and she called to inform that this dish is yummy.
Ingredients
3 deboned chicken whole legs with skin [medium size] – cut bite size pieces
12 red dates
12 cloves garlic – peeled keep whole
12 slices ginger
50 ml water
Seasoning
3 tbsp light soy sauce
3 tbsp Shaoxing wine
1 tbsp brown sugar


  1. Lightly marinate chicken pieces with some light soy sauce for 15 minutes. Mix well until liquid is well absorbed.
  2. Heat up a non-stick wok without oil. Pan fry the chicken pieces [skin side down] about 5-10 minutes until golden and crispy. Turn over to fry the other side for another 5 minutes. 
  3. Push aside and remove excess oil if  any, then add in red dates, garlic and ginger to fry until aromatic and slightly browned.
  4. Mix well all the ingredients, add in light soy sauce, wine and sugar. Bring to a bubbly boil then add in some water to braise [add more if you like to have more sauce].
  5. Braise until sauce is reduced or thick or almost dry and the chicken pieces look shining.
  6. Dish up to serve.
Notes: You can add some sliced leeks to fry with the chicken pieces in Step 6.


This post is linked to the event, Little Thumbs Up August 2015 [Brown Sugar and Molasses]  organised by Doreen from My Little Favourite DIY and Zoe, Bake for Happy Kids hosted by Jess of Bakericious

STEWED LOTUS ROOTS AND PORK BELLY

This is another Chinese pork belly recipe that is easy to prepare yet tasty and aromatic. Both the pork belly and lotus roots are stewed till the flavours are well absorbed by the ingredients.  This dish is quite similar to my earlier posting [Stewed Nam Yee Pork belly With Lotus Roots] with a difference in the flavouring ingredient.  Here, preserved soy bean paste [tau cheong] is used instead of nam yee.
Overall, it is a delicious dish, good to serve with piping hot rice.  In the original recipe, this is served with fried rice.
Like the earlier dish, this can be prepared earlier and just reheat before serving.

Recipe adapted from Yum Yum Magazine [modified]
Ingredients
200 gm pork belly [with skin] – cut into bite size pieces and marinate with some light soy sauce
200 gm lotus roots – scrap the skin lightly, rinsed and cut into 2 cm length pieces
Some  black cloud fungus – soaked and break into pieces
3 shallots – chopped or sliced
1 tbsp fine preserved soy bean paste [tau cheong]
Seasoning
1 tbsp each oyster sauce and light soy sauce
½ tsp chicken stock granules
1 tsp dark soy sauce for colour
Some pepper and sesame seed oil to taste
150 – 180 ml water or enough to cover ingredients

  1. Heat a little oil in non-stick wok, sauté pork belly until slightly browned, push aside.
  2. Add in minced shallots, sauté until fragrant, mix well with fried meat.
  3. Add in lotus roots, black fungus, tau cheong and seasoning ingredients.  Stir fry to mix ingredients and seasoning well.
  4. Add in water, bring to boil then cover to simmer until meat is tender and sauce has thickened. This takes about 30-40 minutes.
  5. Taste to adjust seasoning.  Serve with rice.
 photo 77951578-1914-4b72-8eda-9e40a91183ac_zps331eb4b4.jpg
I'm submitting this post to Cook Your Books Event #26 [August 2015] hosted by Joyce of Kitchen Flavours

Wednesday, August 26, 2015

EZCR#22 - ANG CHOW FLAVOURED MEAT FILLET

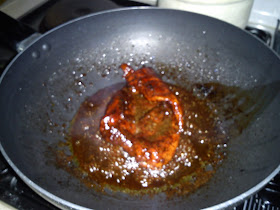
Ang Chow [Red Yeast Wine Residue] is used as marinade for the pork fillet in this dish. This is quite similar to Ang Chow Char Siew and the difference is just the method of cooking. The seasoning sauce is only added after the meat is fried, then braised till almost dry.
The meat is tender and tasty served with the sauce.
Ingredients
1 piece meat fillet [about 250 gm] 
2 tbsp red yeast wine residue [Ang Chow]
1 tbsp sesame oil
Seasoning Sauce [combine]
2 tbsp each of light soy sauce and brown sugar
1 tbsp Shaoxing wine
4-5 tbsp water
  1. Marinate meat with red yeast wine residue for several hours or overnight.
  2. Heat a non-stick pan, add sesame oil. Pan fry meat fillet over medium low heat for about 7-10 minutes on each side.
  3. Pour in the sauce, cover to simmer meat for another 15 minutes or until meat is cooked through/tender and sauce reduced or thickened [turning over meat halfway through cooking].
  4. Dish up meat to cool a little before slicing to serve with shredded zucchini and sauce. Sprinkle some toasted sesame seeds over sliced meat.

This post is linked to the event, Little Thumbs Up August 2015 [Brown Sugar and Molasses]  organised by Doreen from My Little Favourite DIY and Zoe, Bake for Happy Kids hosted by Jess of Bakericious

Tuesday, August 25, 2015

STEAMED MEAT PAUS [SANG YOKE PAUS]


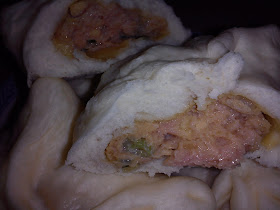
This is another Sang Yoke Pau which I made using Agnes Chang’s recipe for the filling. While mixing the ingredients you can smell the fragrance of it. It is also very easy to prepare. Just combine all the ingredients and chill until required. The filling is not pre-cooked before use. I believe this is why the name is Sang Yoke Pau [meaning uncooked meat paus].
Anyway, the filling is fragrant and the pau skin is soft, moist and chewy.  Nice.

Recipe adapted from Agnes’s book – Let’s Eat [slightly modified]
Ingredients For Filling
300 gm pork or chicken – coarsely minced [I used 50/50 of both meat]
100 gm water chestnuts or sengkuang [I used sengkuang]
2 shallots – peeled and grated
½ inch ginger – skinned and grated
1 stalk spring onions – diced
3 tbsp water
Seasoning
2 tbsp light soy sauce
1 tsp wine
1 tsp each of sugar and sesame oil
½ tsp of salt and msg
¼ tsp pepper
1 tbsp cornflour
  1. Combine all the ingredients and add in the seasoning. Mix well until it becomes a sticky paste and the water well absorbed. Chill in the fridge for 3-4 hours before using.
  2. For the pau skin, I used the Starter Dough Method recipe from my earlier post because this is a good pau skin recipe.
Ingredients for Pau Skin - starter dough method 
Recipe Source - No Frills Recipes
[makes 20 paus]
2 1/2 tsp instant yeast
120 ml lukewarm water [original uses 100 ml]
130 gm pau flour - sifted
  • Mix ingredients together into a soft and rough dough.  Cover and leave to rest for 15 minutes.
370 gm pau flour - sifted
100 gm caster sugar [original uses 125 gm]
120-130 ml water  [original uses 100-115 ml]
2 tsp double action baking powder [original uses 2 1/8 tsp]
5 tsp shortening
Using a Dough Mixer or Hand Knead
  1. Combine all the ingredients [except shortening] with the yeast dough in a mixing bowl.  Knead until well combined [about 5-10 minutes].  Then add in the shortening, continue to knead until soft, smooth and elastic.   I find the dough texture is quite similar to that of my tortoise buns [Mi Koo].
  2. Shape into a ball and cover to rest for about 30 minutes [original is for 1-1 1/2 hours] or until double in size.   
  3. Punch down dough and remove dough to a floured surface.
  4. Divide into 20 equal portions [about 45-50 gm] and roll into balls.  
  5. Flatten each ball, then roll into flat circle.
  6. Wrap filling with each flatten dough.  Gather the edges and shape into pleated paus or round balls.  Place on parchment or greased proof  paper in the steaming tray.
  7. Leave to prove for 45 minutes from the time you finished shaping the last pau or until double in size.  
  8. Steam over high heat for 10-12 minutes in a steamer.  Off heat and leave paus for a further 2-3 minutes before uncovering and remove to cool on wire rack. 
This post is also linked to the Best Recipes for Everyone August 2015 Event (Theme: Dim Sum) organised by Fion XuanHom's Mum Kitchen Diary) and hosted by May (厨苑食谱 @ mayck-law.blogspot.com
 photo 77951578-1914-4b72-8eda-9e40a91183ac_zps331eb4b4.jpg
I'm submitting this post to Cook Your Books Event #26 [August 2015] hosted by Joyce of Kitchen Flavours